Original Post Date- 11/20/12, 1:05 PM Central Standard Time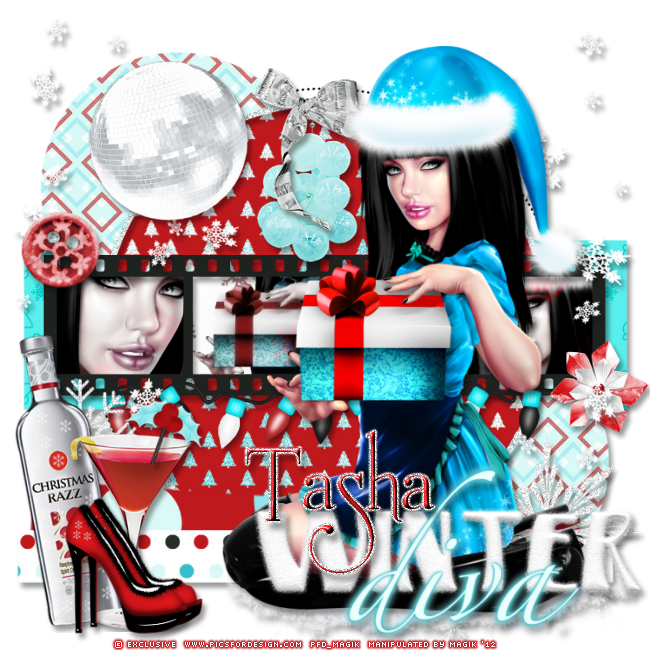
This tutorial is borne from my own manipulated lil' mind.
Any similarity to any other tutorial(s) is purely coincidental.
This tutorial was written for those who have a working
knowledge of PSP and was written using PSP XI,
tho' any version should work.
Supplies Needed: Scrapkit: I'm using a FTU kit from Tasha's Playground,
named Winter Diva.
This is part of an awesome collab.
You can find the kit on her blog
here.
* Leave some love when downloading the kit.  Tube:
Tube: I'm using the artwork of Lady Mishka.
This was a prepaid project & was an exclusive to
PFD.
Do not use this artwork unless you have a license to do so
& have purchased the tube.
Template: Template0014 from me,
here.
Filters: Xero- Radiance
Eye Candy 4000- Gradient Glow
Font: Mussica Swash
Drop shadow: 6 4 40 8, black.
Save your progress often.

Let's do this!

Open up the template.
Duplicate it & close original.
Delete the credit layer at the top.
Working from the bottom layer of the template, up:
dotted circle- leave as is.
rectangle- Select all- float. Defloat- Invert.
Delete this layer & paste paper 10.
Hit delete & select none.
Crop to canvas.
Add a drop shadow.
L. circle- Select all- float. Defloat- Invert.
Delete this layer & paper 4.
Hit delete & select none.
Crop to canvas.
Duplicate. Mirror & flip.
Drop shadow both.
Delete R. circle.
center circle- select all- float. Defloat- Invert.
Delete this layer & paste paper 2.
Hit delete & select none.
circle frame- add a drop shadow.
negative- use your magic wand & click inside each square.
Modify- expand by 2. Invert.
Paste paper 8.
Move this layer below the negative layer.
Hit delete & keep selected.
Next add closeups of your tube,
resizing as desired.
Hit delete on each one.
Select none.
Crop to canvas.
Erase any excess that overlaps in each square.
Merge these closeup layers together.
Duplicate.
On the bottom one, change the blend mode to Luminance (L).
On the top one, add a gaussian blur of 3.
Then change the blend mode to Soft Light.
Add a drop shadow to the negative.
angled strip- Select all- float. Defloat- Invert.
Delete this layer & paste paper 9.
Hit delete.
Select none.
Crop to canvas.
Add your drop shadow.
strip- Select all- float. Defloat- Invert.
Delete this layer & paper 1.
Hit delete.
Select none.
Crop to canvas.
Drop shadow.
snowflakes- erase the top right one.
Add a drop shadow.
Next add your main tube.
Resize as needed.
Position off to the right of the tag.
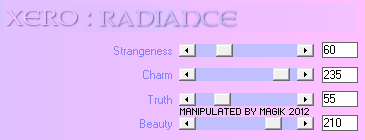
Apply Xero- Radiance at these settings:
Add a drop shadow.
Next we'll add some elements.
For each one I added, I sharpened & added
a drop shadow to, unless specified otherwise.
snow- 80%.
Place to the bottom right under your main tube.
Drop shadow.
snowflakes- Move to the right.
Duplicate.
Mirror & flip.
Add a drop shadow to each.
lights- place on the bottom of the negative.
Drop shadow.
flower2- 45%.
Place on the bottom right
corner of the negative.
Drop shadow.
ornament- 60%.
Place in the top of the middle circle.
Drop shadow.
disco ball- 75%.
Place in the top left.
Drop shadow.
button- 65%.
Position on the top left corner
of the negative & add a drop shadow.
bow- 47%.
Place in the top middle with the ornament.
Drop shadow.
bottle- 75%.
Place on the bottom left of tag.
Drop shadow.
drink- 75%
Place with the bottle.
Drop shadow.
hollypop- 27%.
Rotate 19 right.
Place in the drink, erasing some of the excess stick.
Drop shadow.
shoe- 50%.
Duplicate.
Drop shadow each.
wordart- 75.
Place in the bottom right of tag.
Drop shadow.
Add any other elements, if you prefer at this time.
Now, crop/ resize your tag to your own preferences.
Then, add your proper copyrights & watermarks.
Next add your name.
Then add a bevel:
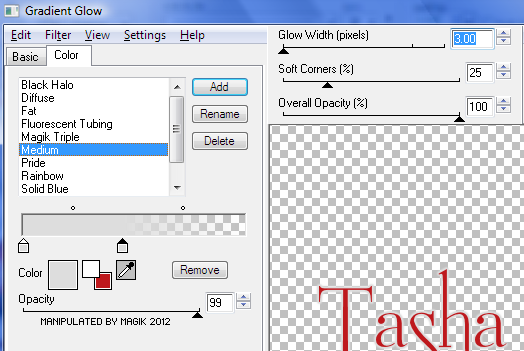
Now add a gradient glow:
And a drop shadow.
Finally, delete the white background layer.
Merge visible, save as a PNG & enjoy.

*hugz*
*Originally re-posted Nov 4th 2019 at http://himaddicts.spruz.com/
**Edited & updated by Magik on 23 May, 2021




 Subject: FTU- Winter Diva
  Sun 23 May 2021 - 0:39


