Original Post Date- 3/18/13, 7:00 PM Central Standard Time*The kit I used for this tutorial is no longer available for purchase,
however, if you had bought this kit in the past,
you will be able to try this. -Magik 5/23/2021
This tutorial is borne from my own manipulated lil' mind.
Any similarity to any other tutorial(s) is purely coincidental.
This tutorial was written for those who have a working
knowledge of PSP and was written using PSP X2,
tho' any version should work.
Supplies Needed: Scrapkit: I'm using a PTU kit from
Tasha's Playground named Kiss My Pink.
This kit was an exclusive to The PSP Project.
*
This kit is no longer for purchase in any shop.Tube: I'm using the beautiful artwork from Barbara Jensen.
This was an exclusive tube at SATC.
You can find more of Barbara's stunning work
here.
Do NOT use this artwork unless you have a license to do so
& have purchased the tube.
Template: Template0022 from me,
here.
Mask: of choice- if not animating.
Filters: Alien Skin Xenofex 2- Constellation
Xero- Radiance
Eye Candy 4000- Gradient Glow
Font: Horny Devils
Drop shadow: 0 2 55 3, black.
(Used for the elements if not animating.)
If animating- NO drop shadow
on any part of the template.

Save your progress often.

Let's do this!

Open up the template.
Duplicate it & close original.
Delete the credit layer at the top.
Working from the bottom layer of the template, up:
rec. 1- Select all- float. Defloat- Invert.
Delete this layer & paste paper12, resized 80%.
Hit delete & select none.
Crop to canvas.
Use the same paper, resized 80% for rec. 2.
Again, crop to canvas.
Merge down.
Add a fat black gradient glow to both.
right square- Select all- float. Defloat- Invert.
Delete this layer & paste paper5, resized 70%.
Hit delete & select none.
Crop to canvas.
oval center- select all- float. Defloat- Invert.
Delete this layer & paste paper13, resized 70%.
Hit delete & select none.
Crop to canvas.
rectangle- Select all- float. Defloat- Invert.
Delete this layer & paste paper3, resized 70%.
Hit delete & select none.
negative- Use your magic wand to click inside
each of the squares. Invert.
Paste paper2, resized 70%.
Hit delete & select none.
Move this layer below the negative layer.
circle- Select all- float. Defloat- Invert.
Delete this layer & paste paper6, resized 70%.
Hit delete.
Select none.
Crop to canvas.
If animating:
Move the right star back down in layers palette.
to just above the left star back.
Merge down.
Duplicate so you have 3.
Name the Star Back 1,
Star Back 2
& Star Back 3.
Close the top 2.
On Star Back 1, add Xenofex- Constellation
at these settings, making sure the random seed is set at 25:

Close this layer & open Star Back 2.
Repeat the constellation settings,
changing the random seed to 30.
Close this layer & open Star Back 3.
Repeat the constellation settings,
changing the random seed to 35.
Close Star Back 2 & Star Back 3
& reopen Star Back 1 for now.
left star- Select all- float. Defloat- Invert.
Delete this layer & paste paper4, resized 60%.
Hit delete.
Keep selected & add your tube.
Position so half the face is in the star.
Hit delete & select none.
Crop to canvas.
Then, duplicate your tube.
On the top one, add a Gaussian blur of 3.
Then change the blend mode to Soft Light.
On the bottom one, bring the opacity down to 60%.
right star- Select all- float. Defloat- Invert.
Delete this layer & paste paper1, resized 60%.
Hit delete.
Keep selected & add your tube again.
Position so half the face is in the star.
Hit delete & select none.
Crop to canvas.
Then, duplicate your tube.
On the top one, add a Gaussian blur of 3.
Then change the blend mode to Soft Light.
On the bottom one, change the blend mode
to Luminance (L).
Modify the word art & word art background
to your own preference.
No drop shadow, if animating.

On mine, I used my magic wand to select the pink words
& after using my manual color correction,
added a bevel:

Next add your main tube.
Resize about 60%.
Move below the word art layers in layers palette.
I positioned mine so the flat bottom of the tube
is flush with the word art.
If needed, you may have to use your eraser
set to square at a good size to achieve the same effect.
Then, add Xero- Radiance at these settings:
NO drop shadow on the tube.
Next we'll add some elements.
For each one I added, I sharpened & added
a drop shadow to, unless specified otherwise.
drink2- 50%.
Place on the right of your tube, on the tag.
shot glass- 35%.
Place on the right of the drink.
lollipop2- 45%.
Rotate 12 right.
Move behind the shotglass.
lollipop1- 40%.
Place with the other lollipop.
bow1- 65%.
Rotate 17 right.
Place on the two rectangles in top right of tag.
Move below tube in layers palette.
cute skull- 55%.
Place on the left of the tag,
above the word art.
bomb- 50%.
Place slightly in front of the drink.
(You may have to move this & the drink
below the word art in layers palette.)
cherry skulls- 55%.
Place on the right of your tube,
below the bow.
Add any other elements, if you prefer at this time.
Now, crop/ resize your tag to your own preferences.
Then, add your proper copyrights & watermarks.
Next add your name.
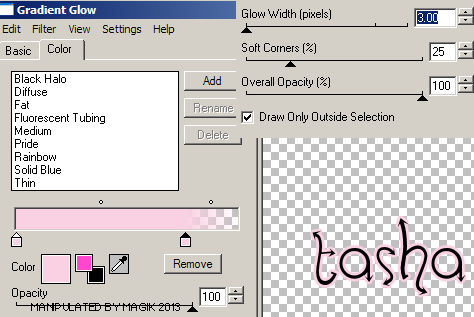
Then add a gradient glow:
And a drop shadow.
If not animating, copy & paste a paper of choice
above the white background.
Apply your mask of choice & merge group.
Finally, delete the white background,
merge visible, save as a PNG & enjoy.

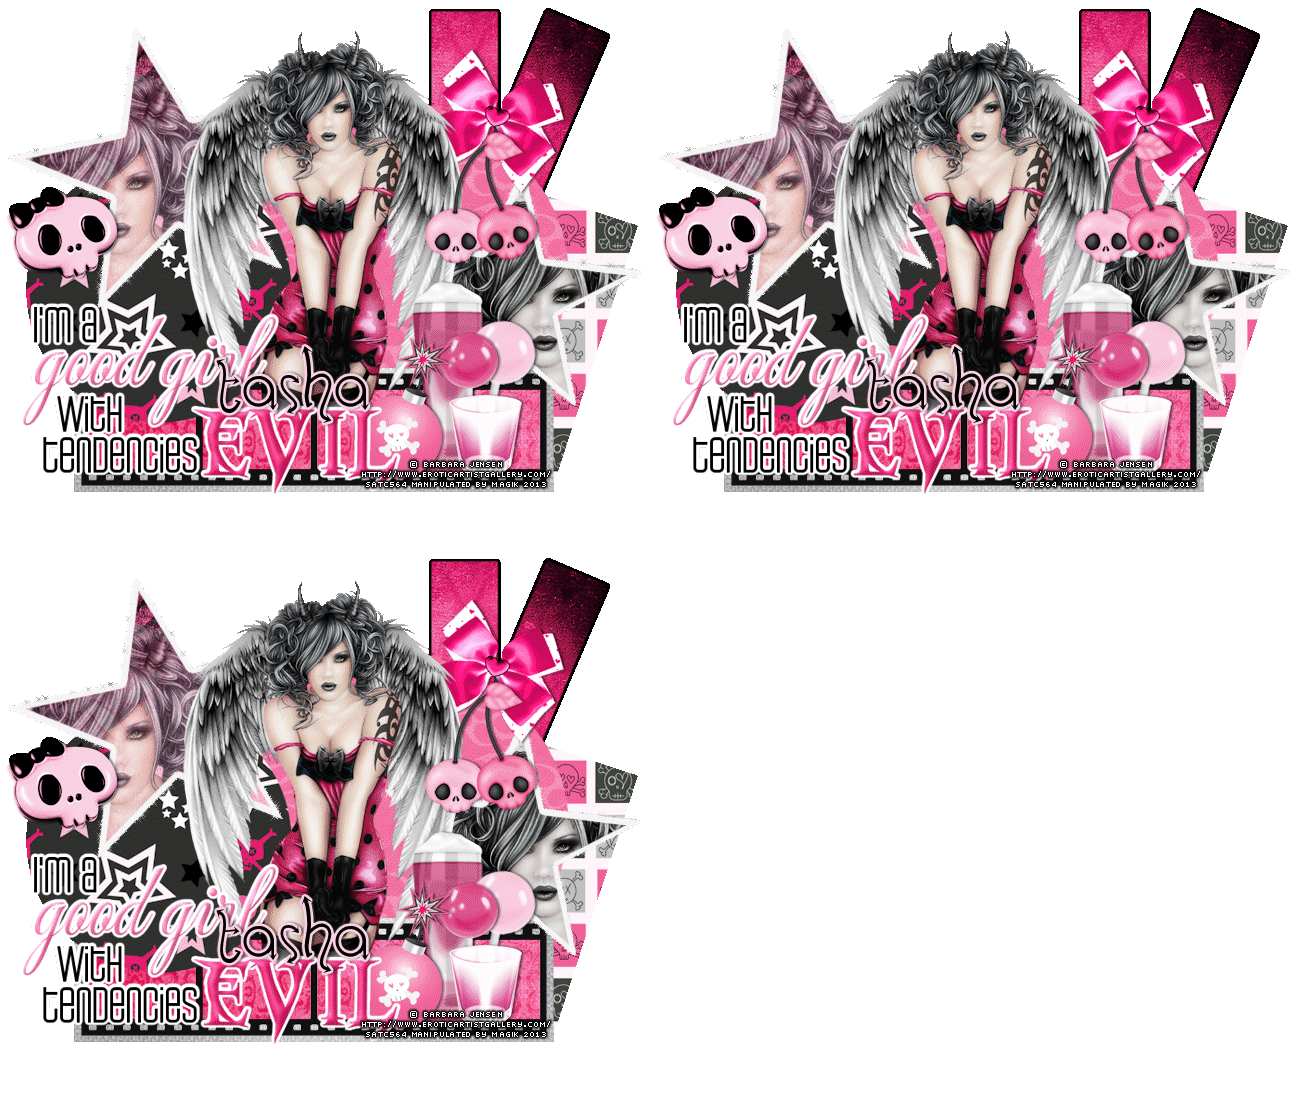
Here's my example:
 If animating, continue:
Open Animation Shop.
Then, back in PSP, copy merged.
Paste in A.S.
Back in PSP, close Star Back 1
& open Star Back 2.
Copy merged & paste after current
frame in A.S.
Back in PSP, close Star Back 2
& open Star Back 3.
Copy merged & paste after current
frame in A.S.
Save at these settings when optimizing:

...And you're finished. =)
This is another animated version,
using an animation bling:

I hope you have fun trying this tutorial.
I'd love to see your results.


 Subject: PTU- Good Girl- Evil Tendencies
  Mon 24 May 2021 - 11:41


