Original Post Date- 1/12/14, 9:56 PM Central Standard Time*The kit I used for this tutorial is no longer available for purchase.
It is one of my own kits that I discontinued a couple years ago,
but it is available as a FTU kit for members here. 
-Magik 5/26/2021
This tutorial is borne from my own manipulated lil' mind.
Any similarity to any other tutorial(s) is purely coincidental.
This tutorial was written for those who have a working
knowledge of PSP and was written using PSP X1,
tho' any version should work.
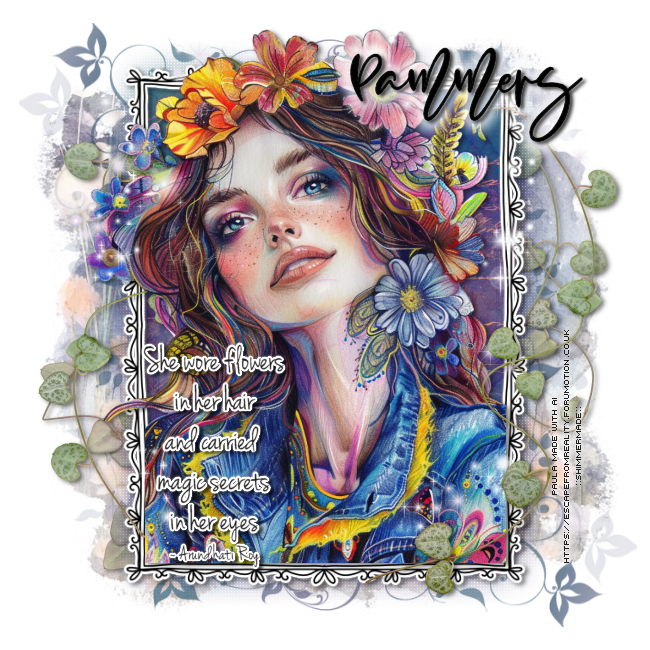
Supplies Needed: Scrapkit: I'd used my former PTU kit named Pynk Panther.
*This kit was later discontinued.
It has since been made FTU for forum members only.
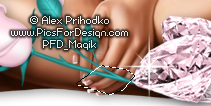
-Magik 5/26/2021Tube: I'm using the gorgeous artwork of Alex Prihodko.
This is a PTU tube & can be found at
Pics For Design.
Do NOT use any artwork unless you have a license to do so
& have purchased or obtained the tube legally.
Template: Template238 from Kristin at Toxic Desirez.
You can find the template
here.
* Leave her some lovin' for the template. Mask: of choice
Filters: Xero- Seasons
Xero- Radiance
Eye Candy 4000- Gradient Glow
Font: Lavanderia Regular
Drop shadows: 3 3 40 15, black for tag.
2 2 40 4, black for the name.
Save your progress often.
Let's do this!

Open up the template.
Duplicate it & close original.
Delete the credit layer at the top.
Working from the bottom layer of the template, up:
Raster 8- Select all- float. Defloat- Invert.
Delete this layer & paste paper 11.
Hit delete & select none.
Crop to canvas & add a drop shadow.
Copy of Raster 9- add a drop shadow.
Raster 9- Select all- float. Defloat- Invert.
Delete this layer & paste paper 14, resized 80%.
Hit delete & select none.
Raster 7- select all- float. Defloat- Invert.
Delete this layer & paste paper 12.
Hit delete & select none.
Crop to canvas.
Drop shadow.
Raster 6- Select all- float. Defloat- Invert.
Delete this layer & paste paper 15, resized 80%.
Hit delete & select none.
Crop to canvas.
Drop shadow.
Copy of Raster 6- Select all- float. Defloat- Invert.
Delete this layer & paste paper 15, resized 80%.
Hit delete & select none.
Crop to canvas.
Drop shadow.
Raster 3- Select all- float. Defloat- Invert.
Delete this layer & paste paper 13.
Hit delete. Select none.
Crop to canvas.
Drop shadow.
Raster 5- Select all- float. Defloat- Invert.
Delete this layer & paste paper 4.
Hit delete.
Select none.
Copy of Raster 2- add a drop shadow.
Raster 2- Select all- float. Defloat- Invert.
Delete this layer & paste paper 5, resized 70%.
Hit delete.
Select none.
Raster 10- Select all- float. Defloat- Invert.
Delete this layer & paste paper 1, resized 70%.
Hit delete.
Select none.
Raster 11- Select all- float. Defloat- Invert.
Delete this layer & paste paper 16, resized 70%.
Hit delete.
Select none.
Raster 4- Select all- float. Defloat- Invert.
Delete this layer & paste paper 9, resized 80%.
Hit delete.
Select none.
Next add your main tube.
Resize as needed.
Position on the right of the tag.
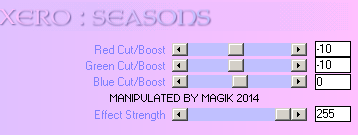
Apply Xero- Seasons at these settings:
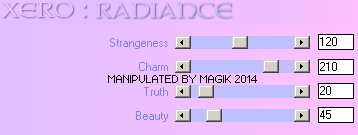
Then add Xero- Radiance at these settings:
Add a drop shadow.
Next we'll add some elements.
For each one, I added a drop shadow to,
unless specified otherwise.
string- 80%.
Place in the top left of tag.
Move under tube in layers palette.
Duplicate.
Mirror & flip.
beaded string- 90%.
Place on left of tag.
staple- 33%.
Place over the top of the beaded string
champagne- 70%
Place on the right of your tube.
champagne flute- 55%.
Place with the champagne bottle.
bow 3- 60%
Position like my example.
kitten- 60%
Position on the lower left.
bangles- 45%
Use your pick tool to rotate them just slightly.
Place to left of the tube.
fedora- 45%.
Place on on left, on her leg.
diamond- 27%.
Duplicate.
Mirror the bottom one & place by the champagne flute.
Resize the top one another 80%.
Rotate 15 right.
Sharpen.
Place with the other diamond.
diamond flare- Duplicate.
Resize one 65%.
Place on the bigger diamond &
Change blend mode to Screen.
NO drop shadow.
Resize the other one 55%.
Place on smaller diamond.
Change the blend mode to Screen.
No drop shadow.
rose- 65%
Rotate 15 right.
Move under the diamonds in layers palette
& position as shown in my example.
Then with your lasso tool, draw a selection
like my example:
On the rose layer, hit delete. Select none.
Add any other elements, if you prefer at this time.
Next, copy & paste paper 3 in your canvas.
Apply your mask of choice.
Merge group.
Resize if needed.
Right click in layers palette & send to bottom.
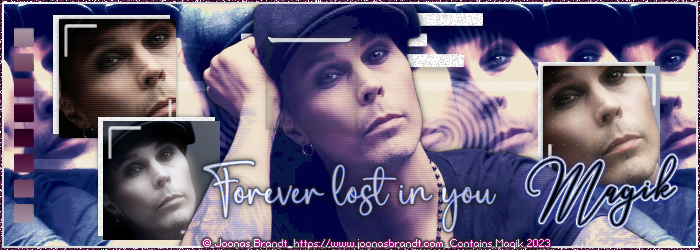
Now, crop/ resize your tag to your own preferences.
Then, add your proper copyrights & watermarks.
Next add your name.
Rotate 25 left.
Then add a gradient glow:
And a drop shadow, using these settings:
2 2 40 4, black.
Finally, merge visible, save as a PNG & enjoy.
*hugz*
*Originally re-posted Nov 6th 2019 at http://himaddicts.spruz.com/
**Edited & updated by Magik on 26 May, 2021


 Subject: PTU Now FTU- Pynk Dream
  Wed 26 May 2021 - 22:32