Original Post Date- 4/19/14, 3:37 AM Central Standard Time*The kit I used for this tutorial is no longer available for purchase,
however, if you had bought this kit in the past,
you still will be able to try this.  -Magik 5/28/2021

For this kit/ tutorial, I had a tough time
choosing between what tube to use, so
I have two different tags with different artwork...
from the same artist of course.

This tutorial is borne from my own manipulated lil' mind.
Any similarity to any other tutorial(s) is purely coincidental.
This tutorial was written for those who have a working
knowledge of PSP and was written using PSP X1,
tho' any version should work.
Supplies Needed: Scrapkit: I'm using the gorgeous PTU kit,
Birthstone Series: Amethyst, from Tasha's Playground.
*This kit is no longer available for purchase.Tube: I'm using the beautiful artwork of Zindy Nielsen.
You can find more of her amazing tubes
hereDo NOT use any artwork unless you have a license to do so
& have purchased or obtained the tube legally.
Template: 523mpm from Millie's PSP Madness.
You can find the template
here.
*
Leave her some lovin' for the template.  Mask:
Mask: of choice
Filters: Eye Candy 4000- Gradient Glow
Font: LoveNess
Drop shadows: 0 2 45 10, black. for most of the tag
14 14 50 4, black for the butterflies & dragonflies
Save your progress often.

Let's do this!

Open up the template.
Duplicate it & close original.
Delete the credit layer at the top.
Also delete the word art layer (named '10').
Working from the bottom layer of the template, up:
Copy & paste paper2 above the white background layer.
Apply your mask of choice & merge group.
Resize as needed.
Duplicate & set the top one to
Multiply at 100%
1- Select all- float. Defloat- Invert.
Delete this layer & paste paper9, resized 60%.
Hit delete & select none.
Drop shadow.
2- Select all- float. Defloat- Invert.
Delete this layer & paste paper6, resized 60%.
Hit delete & select none.
Drop shadow.
3- select all- float. Defloat- Invert.
Delete this layer & paste paper10, resized 70%.
Hit delete & select none.
Crop to canvas.
Drop shadow.
4- Select all- float. Defloat- Invert.
Delete this layer & paste paper3, resized 70%.
Hit delete & select none.
Crop to canvas.
Drop shadow.
5- Select all- float. Defloat- Invert.
Delete this layer & paste paper2, resized 60%.
Move the paper down so the top is in the selected area.
Hit delete. Select none.
Crop to canvas.
Drop shadow.
6- Select all- float. Defloat- Invert.
Delete this layer & paste paper4, resized 60%.
Slide this paper up in the canvas
so the bottom of it is in the selected area.
Hit delete. Select none.
Crop to canvas.
Drop shadow.
7- Select all- float. Defloat- Invert.
Delete this layer & paste paper1, resized 60%.
Slide this paper up in the canvas
so the bottom of it is in the selected area.
Hit delete. Select none.
Crop to canvas.
Drop shadow.
8- Select all- float. Defloat- Invert.
Delete this layer & paste paper5, resized 50%.
Hit delete.
Keep selected & add your tube or closeup.
Resize as needed.
Hit delete & select none.
Crop to canvas.
Now, duplicate your closeup.
On the top one, add a Gaussian blur at 3.
Change the blend mode to Soft Light.
On the bottom one, change the blend mode to
Luminance (L).
Next apply blinds at these settings:
Then add a drop shadow.
* Please note: If you're planning on resizing your tag,
don't add the blinds effect until after the tag is resized.
Otherwise the effect will be buggered up on your tag.

9- leave as is.
Next we'll add some elements.
For each one, I added a drop shadow to,
unless specified otherwise.
scatter- Mirror & resize 70%.
Place on the right of the tag.
leaves- 57%.
Rotate 15 right.
Sharpen.
Place in the top left corner.
Move to just below the smaller circle
in the layers palette.
clock- 75%.
Place on the bottom left.
ribbon- 75%. Mirror.
Position it so the loop is directly
over the face of the clock.
tassle- 40%.
Rotate 15 left.
Sharpen.
Place on the right of the clock.
Move below the ribbon in layers palette.
locket- 50%. Mirror.
Place in the lower right of the tag,
above the scattered flowers in layers palette.
flowers- 45%.
Rotate 55 left.
Sharpen.
Place on the lower left.
bow- 60%.
Rotate 12 right.
Sharpen.
Place in the upper right corner.
key- 45%.
Rotate 12 right.
Sharpen using the 'Sharpen More' option.
Place on top of the bow.
ring- 35%. Mirror.
Place to the right of the locket.
flower1- 50%.
Place on the bottom left
like my example.
pendant- 45%
Place on the top left above the leaves.
flower4- 35%. Sharpen.
Place in the center of the leaves
in the top left.
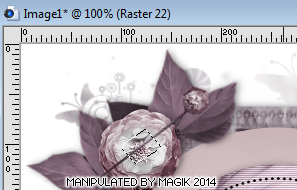
pin- 35%.
Rotate 25 left.
Sharpen.
Place on the top right with the cluster.
Use your lasso to make a selection
in the middle of the pin.
Hit delete & select none.
Then add your drop shadow.
butterflies- 45%
Place on the right of the tag.
Use the following drop shadow:
14 14 50 4, black
butterfly- 45%
Rotate 33 right.
Sharpen.
Place just above the rose on the bottom left.
Add the same drop shadow.
dragonfly- Duplicate.
On the top one, resize 30%.
Flip.
Rotate 15 left.
Sharpen.
Place on the top of the tag, off to the right.
On the bottom one, resize 35%.
Place on the left.
Add the same drop shadow to both.
Add any other elements, if you prefer at this time.
Now, crop/ resize your tag to your own preferences.
*If you've resized your tag,go back & add the blinds effect to your tube.
Then, add your proper copyrights & watermarks.
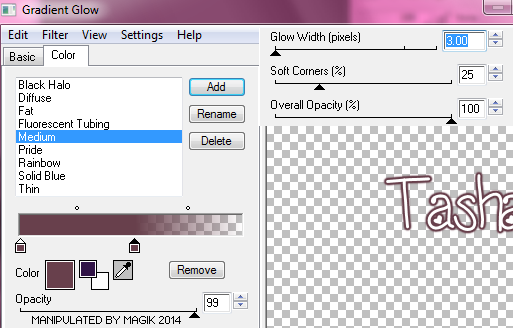
Now add your name.
Then add a gradient glow:
Next, add your drop shadow.
* Make sure you change your settings back to0 2 45 10, black. 
Finally, delete the white background at the bottom
in layers palette,
merge visible, save as a PNG & enjoy.

I also have tags for Zindy:
I hope you enjoyed trying this tutorial.
I'd love to see your results.

*hugz*
*Originally re-posted Nov 6th 2019 at http://himaddicts.spruz.com/
**Edited & updated by Magik on 28 May, 2021


 Subject: PTU- Amethyst Dreams
  Fri 28 May 2021 - 10:43
 -Magik 5/28/2021


