I had thought about posting this in my tutorials,
but I'll just have it here for now.
Please do NOT repost this tutorial.
You may link to it, however.

Also, do NOT steal my screen shots.
If you ever have selections to load
but don't want to bog down your PSP program by
adding them in your PSP folders,
you can create a preference to point to them instead.
This way if you're finished with using them, you can remove them easily.
I have made this little tutorial complete with a couple screen shots on how to do this.
This should work in ALL versions of PSP, to my best knowledge.

Make a PSP Folder someplace on your computer,
an external or partition on your computer.
I name mine 'PSP Stuff'.
In this folder, make a sub-folder & name it 'Selections'.
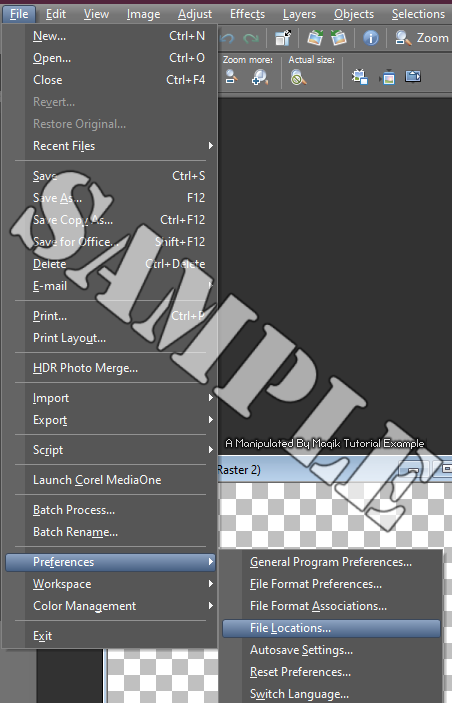
In PSP, click on File and open up File Locations like my example:
On the left side of the panel in the window that opens up,
scroll down to Selections & select it.
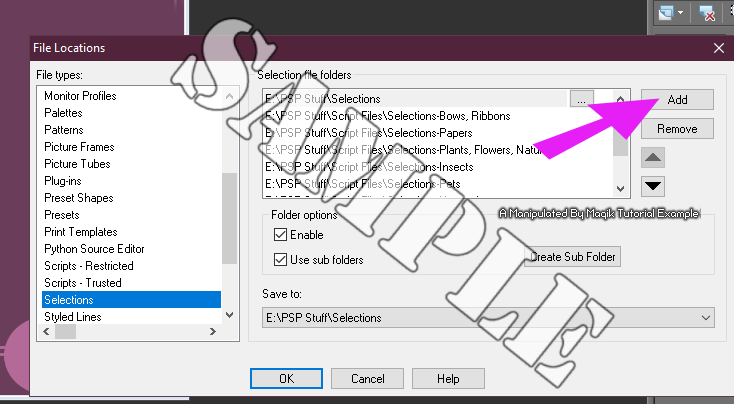
You should see two folder file paths on the right side,
under where it says 'Selection folders'.
Those are the default locations.
*Ignore all mine in my example- they're ones for my CUscripts for making kits. Now, if you want to add a folder that those selections are in,
click the Add button on the right.
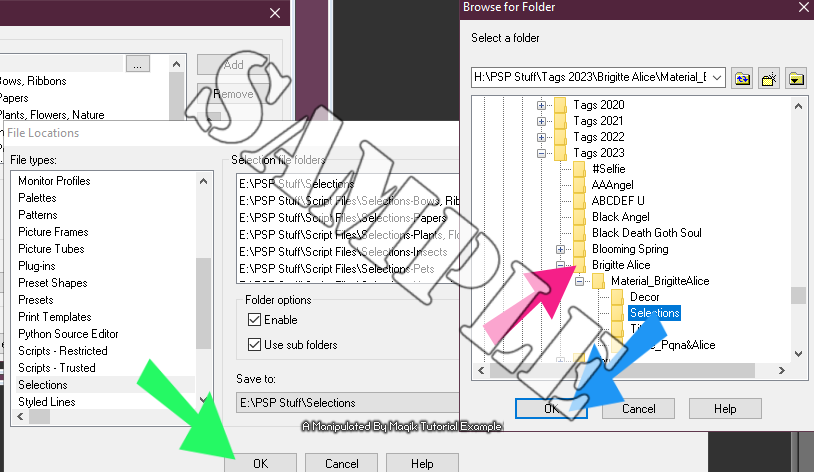
Now you'll need to find your drive or partition & your PSP folder.
Click the little plus sign beside your computer
or external drive where your Selection folder is at.
Mine is on my 'H' drive, so it's not going to show
in my example below (I have a lot of folders).

Next, find your folder where your PSP stuff is at (pink arrow)
& click on the little plus sign to the left of it.
Now, click on your Selections folder like my example
(it's highlighted in blue):
Once you've selected your folder, click OK (blue arrow).
Then once that window is closed,
click on OK again (green arrow).
You now know how to add a selections folder preference in PSP.
If you ever wish to remove that folder,
you can always go back into your preferences,
click on the folder path in the main window
to select it, click remove, then OK.
I hope this tutorial helps you.

Thank you for reading.


 Subject: Loading Selections In PSP
  Mon 5 Jun 2023 - 7:45