Original Post Date- 8/5/12, 2:32 AM Central Standard Time*The kit I used for this tutorial is no longer available for purchase,
however, if you had bought this kit in the past,
you still will be able to try this.
I would think that another kit of a similar theme
should also work.  -Magik 5/20/2021
This tutorial is borne from my own manipulated lil' mind.
Any similarity to any other tutorial(s) is purely coincidental.
This tutorial was written for those who have a working
knowledge of PSP and was written using PSP XI,
tho' any version
should work.
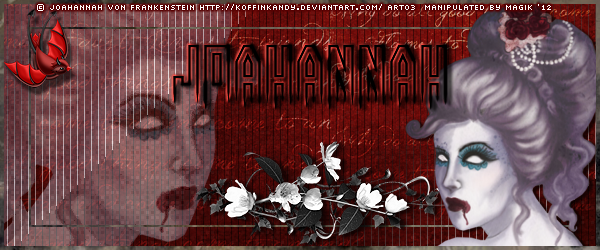
Supplies Needed: Tube: I'm using the artwork of Joahannah von Frankenstein
which I had obtained from the ART store.
Do NOT use this artwork unless you have a license to do so
& have purchased the tube.
Scrapkit: I'm using a kit called Devilish from AmyMarie.
*This kit is no longer available, however, another 'dark/ goth' themed kit could work. Filters: Xero- Fritillary
Tramages- Tow The Line
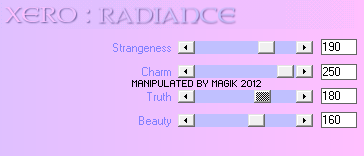
Xero- Radiance
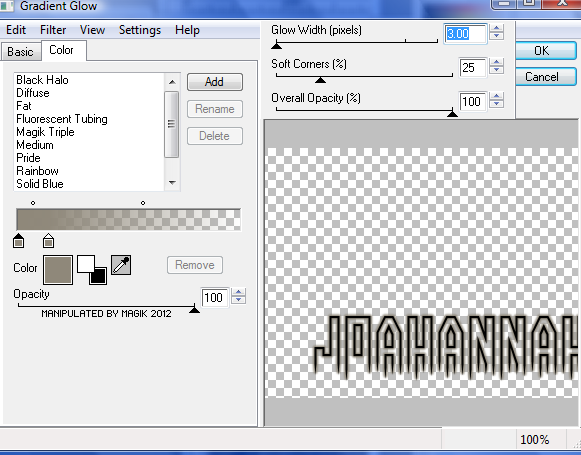
Eye Candy 4000 Gradient Glow
Font: More Than Human
Drop shadow used: 2 4 65 3, black.
Save your progress often.
Let's do this!
Open a new canvas 600 X 250 px.
Copy & paste paper 2.
Crop to canvas.
Duplicate this layer.
Close out the bottom layer for now.
On the other layer, change the opacity to 50%.
Now copy & paste your tube or closeup.
Change the opacity to 75%.
Now merge these 2 layers visible.
Duplicate twice so you have three.
Name them Fritillary 1, Fritillary 2 & Fritillary 3
On fritillary 1 layer, apply Xero- Fritillary at these settings:
On fritillary 2- apply fritillary again,
but change the variation to 35.
On fritillary 3- apply fritillary again,
changing the variation to 40.
Hide the fritillary 2 & 3 layers for now.
Next, unhide your bottom layer.
Duplicate & bring this layer to top.
Apply Tramages- Tow The Line at the default settings.
Drop the opacity down to 45%.
Next, copy & paste your main tube.
Resize 65%.
Apply Xero- Radiance at these settings:
Add your drop shadow.
Now, copy & paste paper 3.
Crop to canvas.
Selections- Select All. Modify- Contract by 4.
Hit delete & select none.
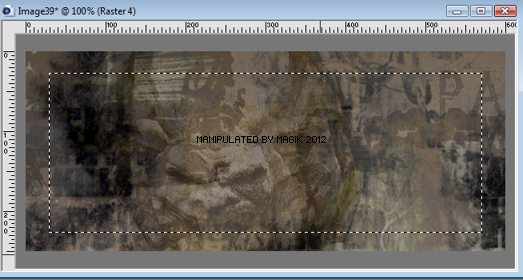
Copy & paste paper 3 again.
Using your selection tool, set to rectangle,
draw a selection inside your tag like shown:
Invert & hit delete.
Select none.
Now, on this rectangle layer-
Select all- float- defloat.
Modify- Contract by 2.
Hit delete & select none.
Move this layer below your main tube layer.
Copy & paste the devilbird.
Mirror. Resize 20%.
Sharpen.
Place in the top left corner.
Add a drop shadow: 7 4 55 3, black.
Copy & paste flowers8.
Rotate 90 left.
Resize 60%.
Sharpen & add a drop shadow.
Next add your proper copyrights & watermarks.
Now add your name.
Add your gradient glow:
Then add a bevel at these settings:

Now add your drop shadow.
To animate:Copy merged & paste into Animation Shop.
Go back to PSP, hide fritillary 1 & unhide fritillary 2.
Copy merged & paste after current frame in A.S.
Go back to PSP, hide fritillary 2 & unhide fritillary 3.
Copy merged & paste after current in A.S.
Play your animation.
If happy with the animation,
save as a gif & you're done.
I hope you enjoyed trying this tutorial.
I'd love to see any of your results.
*hugz*


 Subject: PTU- Devilish Beauty Forum Style Tag
  Fri 21 May 2021 - 0:02