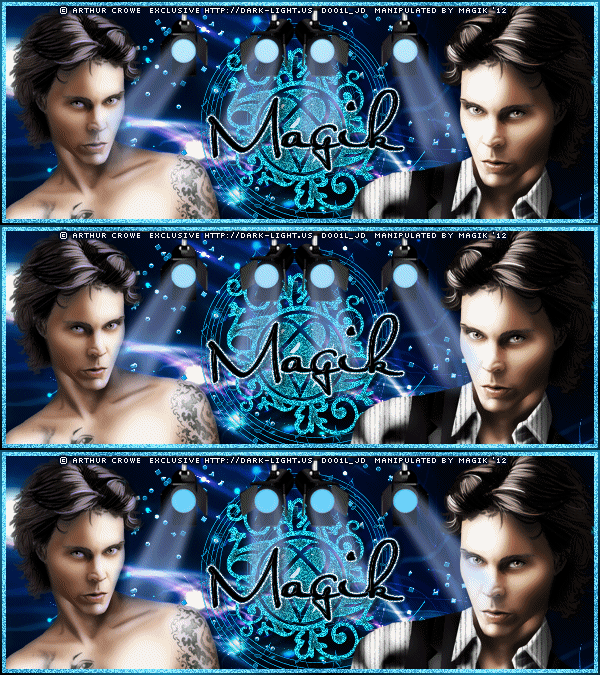
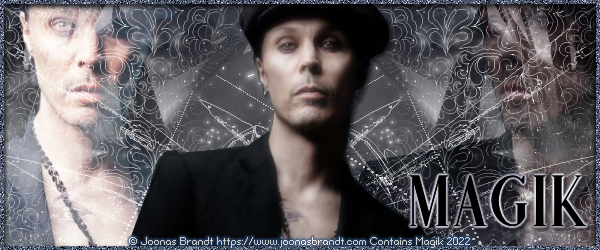
This tube is available here in this forum. now.
Any tube can be used, provided you have a license & bought it.
Never use any artwork unless you have a license to do so & have purchased it.
Texture: of choice.
Filters: Xero- Radiance
DBS Flux- Bright Noise
Eye Candy 5: Impact- Backlight
Eye Candy 4000 Gradient Glow
Font: Satisfaction
Drop shadow used in this tutorial is 2 4 48 4.
Save your progress often.
Let's do this!
For the banner, start with a new image, 600 X 225 px.
And for the avi 150 X 200 px.
Flood fill both black.
Copy & paste your texture of choice into both
(you can resize it for your avi, if needed).
Add a new layer to both the banner & avi.
Flood fill this layer with a foreground/ background gradient of colours
that match your tube or kit:
Angle 45/ repeats- 4.
Then change the blend mode to Overlay 100% on both.
Next, copy & paste your stage lights.
Resize as needed (depending on what kit you're using will determine this.)
* Sizing them down so they're somewhere between 75-80 px in height is best.Position them in the middle at the top of the tag.
On the avi, you only need one stage light.
Just crop one off to add.

Leave these for now, we'll come back to them.
Next, copy & paste your tube or closeup.
Resize as needed.
Place over on either side of the tag.
Paste the tube again & resize so it's slightly larger.
Mirror & place on the opposite side of the tag.
Filter both tubes to your own preferences (Xero Radiance, etc.)
Then give them both a drop shadow.
Do the same for your avi.
Add a few elements from your kit to make your tag more pretty.
 * The heartagram decoration I used on mine is NOT in the kit I used,I made it with a brush I made a long time ago.
When finished, at the top of your tag & avi, add a new layer.
Flood fill with a light colour or gradient from your kit or tube.
Selections- Modify & contract by 6 on both the banner & avi.
Hit delete & select none.
Duplicate this layer twice for a total of three.
On each layer, add some noise.
I used DBS Flux bright noise, set at 50- light:
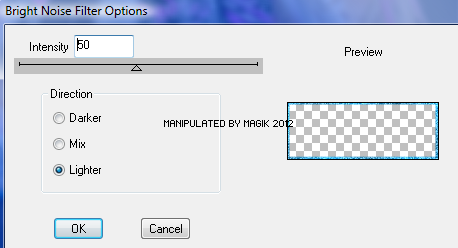
For each layer, click the the dot twice to change the noise a bit.
When done, close the top two layers.
Name them noise border 1, 2 & 3.
Add another layer & flood fill it with a darker colour or gradient.
Selections- Modify & contract by 2 on both the banner & avi.
Hit delete & select none.
Now add your copyrights & watermarks to both.
Next add your name.
Add a gradient glow & drop shadow to your liking.
Next go back to your stage lights layer.
With your magic wand, click inside each of them
(the white circles).
In your layers palette, right click & promote that selection to a layer.
Then drag that promoted layer above your tube layers in the layers palette.
Select none.
Duplicate this layer twice for a total of 3.
Close out the top two promoted layers.
On the bottom one, adjust the colour to whatever you prefer.
Make sure the colour is light.
Then on the other two, darken that colour just slightly for each.
Name them lights 1, 2 & 3.
Now, to set this up so it works,
start with your middle set of lights (lights 2).
Apply Eye Candy 5: Impact- Backlight, at this setting:
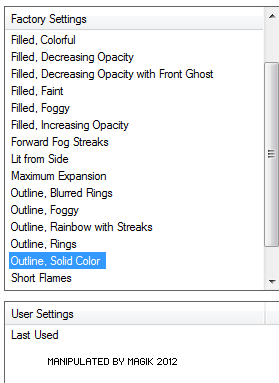
Then on the next tab, change the direction of the light,
so its shines directly (straight) down:
 * On the third tab, I kept the settings as they were for all 3 layers.
Go back to lights 1.
Change the settings to change the direction of the lights:

Leave the random seed as is, we won't use it at all.
On lights 3, change the direction to the right:
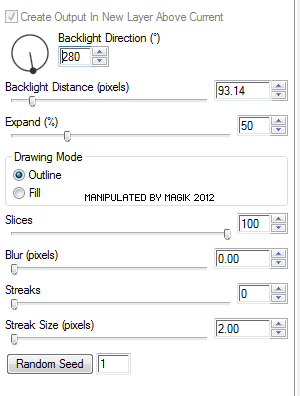
Again, leave the random seed as is.
Close the top light layers (2 & 3) when done.
For the avi, you'll want to adjust the settings a bit:
For the middle light layer,
I had the backlight direction changed to 295.
The lights layer 1, I set at 285.
The 3rd light layer (top layer) was 305.
Close the top two light layers when finished.
Now, open up Animation Shop.
Making sure you have the lights layer 1 & noise border 1 open,
copy merged & paste into animation shop.
Go back to PSP & close both those layers
& open the lights 2 & noise border 2 layers.
Copy merged & paste after current frame in animation shop.
Back in PSP, close these layers & open lights 3 & noise border 3.
Copy merged & paste after current frame in animation shop.
Now, still in animation shop, select all.
On frame properties, change it to 20.
Save as a gif.
Do the same for the avi,
copying merged so you have three frames.
Select all & change the frame properties on this one to 30.
Save & you're all done.
I hope you find this little tutorial useful.
*hugz*
*Originally re-posted Nov 3rd 2019 at http://himaddicts.spruz.com/**Edited & updated by Magik on 16 May, 2021


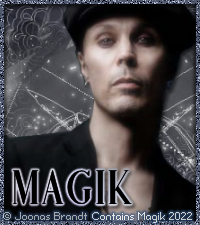


 Subject: PTU- Rockalicious Forum Set
  Sun 16 May 2021 - 12:04
