Original Post Date- 8/15/12, 7:40 AM Central Standard TimePlease Read First:*The template I used for this tutorial is no longer available.
Stef's blog is no longer online & Dwana's 4-shared link
no longer has the template for download.
However- I have 'recreated' the template a bit
& have included it in a zipfile. 
The basic layers needed for the temp is there
& I did make my template 50 px longer than the original.
I would ask that if downloading my template, please use it for this tutorial ONLY.
Thank you.
Also, the texture I used for my first example is no longer available.
BUT! So-ghislaine does have other textures you may use,
as I had used for my 2nd example at the end of the tutorial.
With that being said, if you have the original template
or use my recreation- you will be able to try this tutorial. 
-Magik 5/22/2021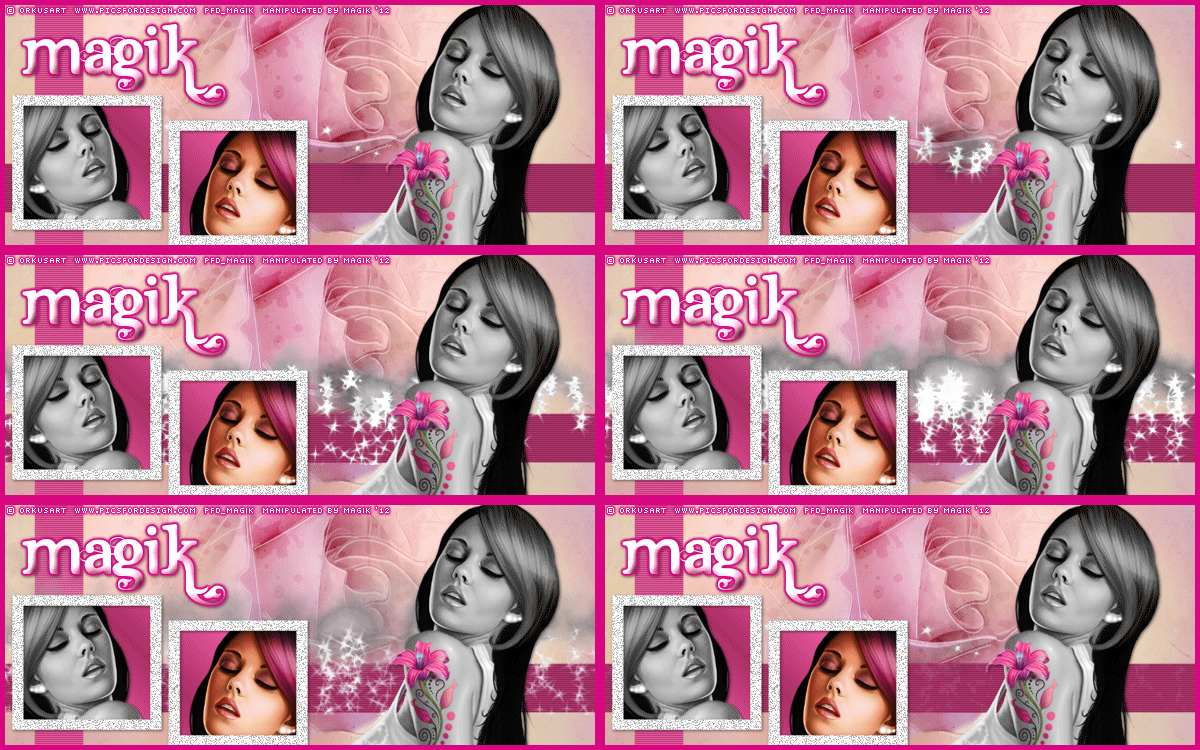
This tutorial is borne from my own manipulated lil' mind.
Any similarity to any other tutorial(s) is purely coincidental.
This tutorial was written for those who have a working knowledge of PSP
and was written using PSP XI, tho' any version
should work.
Supplies Needed: Tube: I'm using the gorgeous artwork of Orkus Art
which you can find at
PFD.
Do NOT use this artwork unless you have a license
to do so & have purchased the tube.
Texture: I'm using a beautiful texture from
So-ghislaine.
The rose texture 6 from their 'Bright Roses'
texture pack is no longer available,
but she has many other awesome textures you can find
here.
Template: D&S_CollabForumBanner_04
From Stef's Tutorials & Dwana Designs.
This template is no longer available from either Stef or Dwana.
However, I have a recreation of this template you can grab
here.
Animation: Ani 68 from Simone on her blog
here.
*
Leave some love when downloading the supplies.
 Filters:
 Eye Candy 4000 Gradient Glow
Font: Dutch & Harley
Drop shadow: 1 1 50 4, black.
Save your progress often.
Let's do this!
Open the template.
Delete the following layers:
Credit, text, white stars, white star Shadow 1,
square mesh vinegrette overlay.
*If using my template,
you should only have to delete my credit layer. 
Now copy & paste the texture above
the background layer.
Resize 75%- 80%.
*In some of the steps below,
you may 'skip' a portion of them,
if using my template. 
Next move the right rectangle down
in your layers palette above the left rectangle.
Merge down.
Selections- Select all.
Float- defloat.
Delete this layer & add a new layer.
Flood fill with with a medium-dark colour from your tube.
Select none.
Effects- Texture Effects- Blinds at these settings:
Width- 2/ Opacity- 20/ Color- Black/ Horizontal ticked.
vertical rectangle-
Selections- Select all. Float- defloat.
Delete this layer & add a new layer.
Flood fill with with a lighter colour from your tube.
Select none.
Apply the same blinds effect.
white frames-
click inside both with your magic wand.
Modify- expand by 3.
Add a new layer below the frames layer.
Flood fill with a gradient of choice.
Keep selected & invert.
Add your tube to each frame.
Hit delete on each.
Select none.
Use your eraser to remove any excess that overlaps.
Crop to canvas.
Add a drop shadow to both.
On the frames layer, add some noise-
Uniform/ Monochrome/ 75%.
Then add a drop shadow.
Now add your main tube.
Resize as needed.
Add a drop shadow.
Add a new layer.
Flood fill with a slightly darker colour from your tube.
Selections- Select all. Modify-
Contract by 5.
Hit delete & select none.
Now add your proper copyrights & watermarks.
Now, add your name.
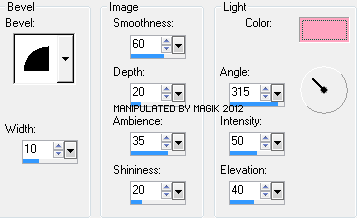
Add a bevel:
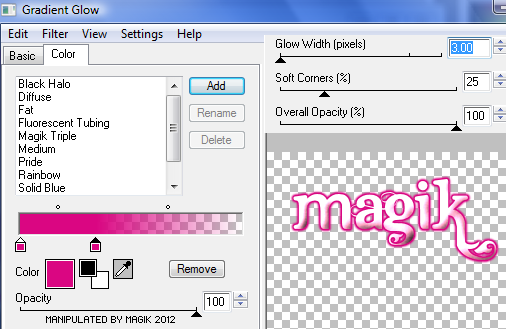
Give it a gradient glow,
using the same colour as your border:
Then add a drop shadow.
If you don't wish to animate,
merge all & save as a PNG.
To animate:
Open up the animation bling.
You may have to open it in
your PSP program first & convert it to an Animation Shop file.

Once you have the animation bling opened in A.S.,
select all frames & resize so it's 600 px in width.
You may resize it to 650 px in length,
if using my template.

Back in PSP, close all your layers, except the bottom 4.
Copy merged & paste in A.S.
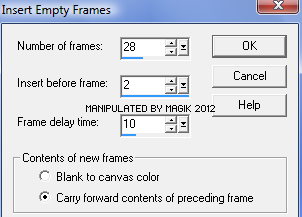
Animation- Insert frames- Empty:
This will give you 29 frames.
On your animated bling,
Select all (Ctrl+A), Copy,
Select all frames of your tag base,
then position the animation where you want it
(so the edges line up on each side of your tag),
then paste into frame (Ctrl+E).
Back in PSP, close those 4 layers & open the other layers.
Copy merged.
Paste as a new animation in A.S.
Make sure all frames are selected on your base tag.
Then tick the propagate paste icon:
Then on your merged image you just pasted into A.S.,
drag into your animation.
Position it so it lines up & click to set it.
Now, the animation is a bit 'choppy',
so we're going to add a fade effect to even it out:
Copy frame one and paste it after the last frame.
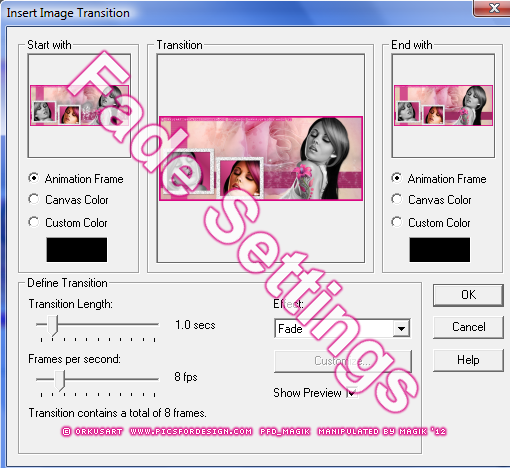
Right click the second to last frame-
Insert Image Transition- Fade:
After the faded frames are added,
delete the last frame.
Next, select all frames.
Animation- Frame Properties (duration).
Change to 7.
Then select only frames 30-37.
Change the duration to 2.
Last, save as a gif & enjoy.

This is an animation forum set, I made
using the photography of
Ralf Strathmann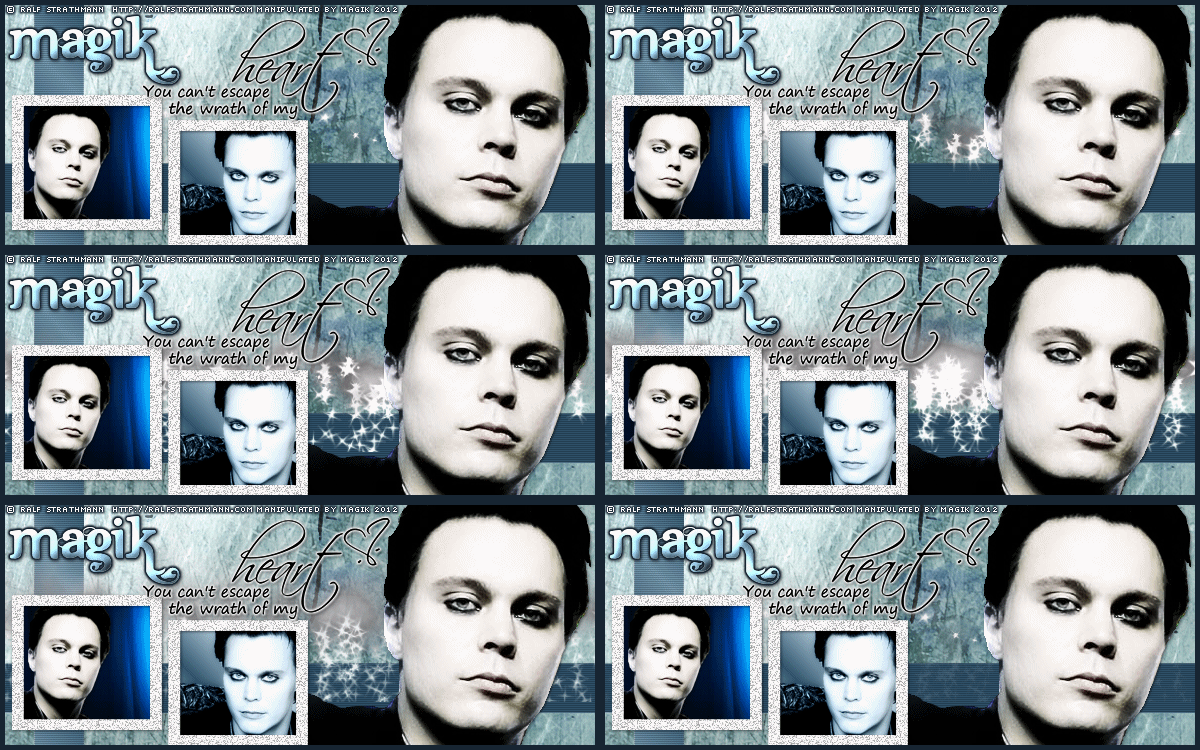
I hope you enjoy trying this tutorial.
I'd love to see your results.
*hugz*




 Subject: No Scraps Forum Style Tag Tut- Tattoo
  Sat 22 May 2021 - 13:25


